Top tips for taking atumn cuttings

September's a great time to take cuttings from your tender perennials just in case they get killed off by a cold snap in the winter. I call it hedging your bets. Plus, if they're loverly plants you'd like more of then this is a great way to make new plants for free.
All you need is some good quality, free draining, peat free compost, a few clean pots, and a label or two.
We especially take cuttings of what's beginning to be quite a nice salvia collection - I don't want to lose these! But you could also take pelargonium cuttings, penstemon cuttings, phlox and lots more.
What you do is this:
- Pick a stem where there is a side shoot (or perhaps two!) coming out from between the leaf and the stem.
- At a sharp angle, cut the stem just below the next join below this side shoot (where there are more leaves coming off.)
- Strip the bottom leaves and pop the stem straight into the pot you've filled with well-drained compost. Cuttings root best when the stems are popped into the pot right against the side of the pot, so you could put four or five cuttings around the sides of one pot.
- Snip out the growing tip of the cutting you've popped into the pot, so that only the beginnings of the side shoots you originally spotted as good cutting material remain, and the protective leaves. Snip half the protective leaves off, and put the pot to one side to let it root. Don't over water it, and don't leave it anywhere too sunny - a dappled shady spot out of direct sunlight and protected from frost is perfect. We keep ours outside but shaded until the first threat of frosts, and then we pop them in the cold greenhouse, which only gets a little warmth when proper frost is threatened.
- Water from underneath and not very often! The compost should never feel wet, just damp, or the cuttings will rot off.
Then leave your cuttings alone! Sharon likes to pull at them often to see if they're beginning to root, but I'd leave them till spring and then have a look at the holes in the bottom of the pot and hopefully you'll see teeny roots poking out of the bottom.
In spring you can prick out your cuttings and pot them up individually, harden them off, and then plant them out when all risk of frost is past.
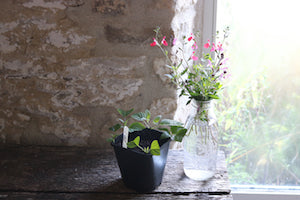
The salvias in water in this picture (hot lips and a similar friend,) will root happily in water, so you can always take a few stems and pop them in water and let them root that way - great fun and educational for kids to see (I quite like obsessively watching too!)
The same principles to this way of taking cuttings applies to most shrubs and perennials, so have a go with lots of things from your garden, and make yourself lots of free plants!
Good luck and have fun with them!


